
Okay fine, I now believe in aliens – metaphorically.
The Realest Aliens I’ve Ever Seen
Car Studio 24: I’ll Go to Counseling
Car Studio 22 – World Events: What Did Not Happen
Snake Eyes / Turning Point parallels.
List of recent world events for reference.
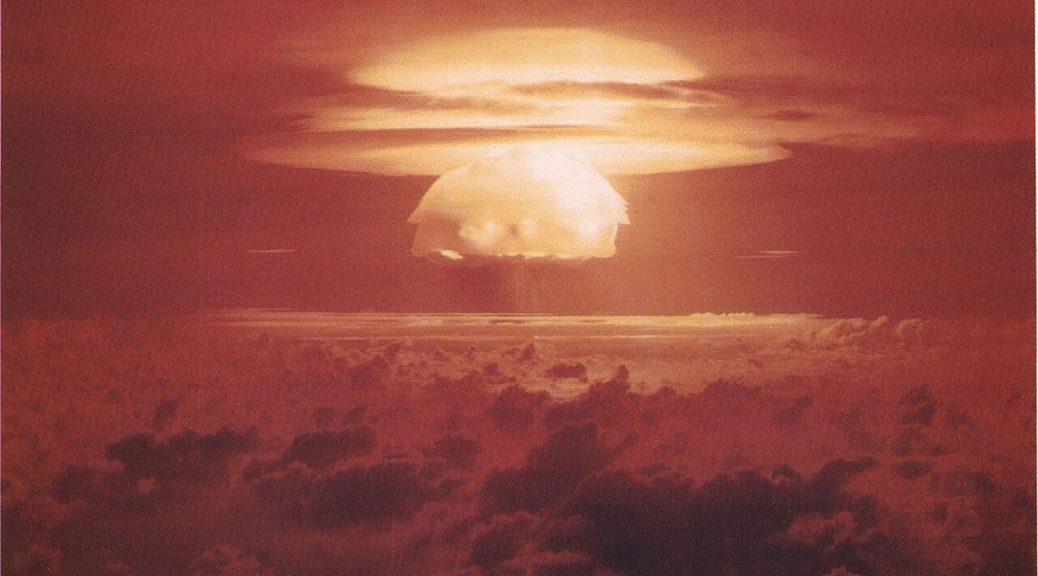
I happen to believe this is related. The fear of nuclear war is supposed to initiate action:

Car Studio 21: I Was Wrong
To Those Whose Existence is Doubted
Message received.
I flinched. Very funny. Now what?
Nuclear in December? Severe and Imminent?
How do I come to the conclusion that there is a high chance of nuclear war in December? It is an extremely specific timeline for an extremely unlikely event. I think it is reasonable, and what follows is why I think that.
Current Events
At this point, current events influence my prediction, and the US is currently strongly threatening to invade Venezuela, who is allied with Russia.
Physical Impossibility of Charlie Kirk’s Assassination
Charlie Kirk’s assassination is not physically possible as presented by the FBI and by extension the US government especially the executive branch, including President Trump. A .30-06 round entered Charlie Kirk’s neck and did not exit.
Anybody repeating that lie is blatantly lying. Besides the countless other inconsistencies in the official story, the .30-06 lie is so blatant it requires total disregard for continued appearance of justice to tell it and wanton ignorance to accept it. .30-06 is unnecessary. If you’re going to pick a round size to lie with, it could have been .223 / 5.56 which wouldn’t be so blatant. .30-06 is unnecessarily blatant.
1998 Snake Eyes Movie Parallels
Snake Eyes parallels to Turning Point are too many to be coincidence. I am not a person who looks for real-life meaning in movies. I see zero other movies besides Snake Eyes that I would expect to predict real life events. However, when these parallels were pointed out to me, I looked at the full plot and said, “Those aren’t just parallels, those are the same plot with the same names.” This is unprecedented as far as I know.
From Conclusion to New Premise
How did the above 2 impossibilities happen? Unless I hear a better explanation, this is what happened: 2 movies were made. Snake Eyes was made in 1998 presented as a movie, then Turning Point was made from 2012-2025 and presented as real life.
Okay, what does that mean? If that explanation is correct – and I have not heard a better explanation – it means someone or some entity had the power to fund a movie to be made in 1998 that they also had the power to make happen in real life starting in 2012. Whoever this is is very powerful, apparently more powerful than the president of the US, or at least working with him.
At this point, if you doubt that somebody has that much power, or if you doubt that somebody with that much power would make a movie about what they are going to do, I understand the doubt. However, it appears to be the reality, and I have no choice but to continue with the evidence presented, accept the reality presented, and continue with a new premise: that somebody controls our politics all the way up to the president and communicates through the media.
We have either a failed government that has turned on us, or a near-complete foreign infiltration. I don’t know which, but it doesn’t matter really. Neither is our friend.
Fortunately if this is true, there are others who know, probably many in the media, and it’s possible there is other information coming out through doublespeak and portions of the plan that can’t be hidden. Knowing that, I am taking some media messages seriously that I otherwise would not take seriously.
December?
Snake Eyes
First, look at the plot end of the movie Snake Eyes under the heading Unresolved Aspects of the Movie. Hurricane Jezebel, (Jezebel brings in the devil) hits the United States over a holiday weekend, that is strong enough to destroy the arena representing Trump’s bankrupt United States and brings down “Powell’s globe” from the top and send it rolling on the sidewalk. In the original ending, a tidal wave hits the arena, not just a hurricane. The hurricane clearly takes the characters by surprise as they fight over the assassination of Charlie Kirk.
It was presented as a generic holiday. Is the holiday Halloween? Thanksgiving? Christmas? I think Christmas.
Catholic Church Jubilee Year 2025
Catholic Church Jubilee Years are every 25 years.
Before I knew anything of the Jubilee year, my expectation was for us to be stuck because of travel lockdowns (as a parallel to closing the doors of the arena in Snake Eyes that locks the occupants inside). Based on other entirely independent media messaging besides Snake Eyes, I had put the date where the “doors close” somewhere between 30 November and 15 December, so I would have said “doors closed by 15 December”. This is part of the description of the Jubilee year:
The year concludes with the Jubilee of Prisoners on December 14, 2025, marking the symbolic closing of Holy Doors around the world, with the exception of St. Peter’s Basilica in Rome, which remains open until its final closure on January 6, 2026. The Jubilee events are designed to foster spiritual renewal, reconciliation, and a deeper sense of community across diverse sectors of society.
Katt Williams
The second source of media messaging is Katt Williams. Katt Williams is about the least likely place most people would look for serious information – but I think that’s the point. Katt Williams’ interview on Club Shay Shay in January 2024 made enough of a splash that I knew about it by accident because people were saying that he predicted the Puff Daddy trial and other revelations in Hollywood during 2024. I got the impression that Katt Williams knows more than he lets on, so I made it a point to see him live on 26 September 2025 in Columbus. On the way driving to the show, I thought, “Really, why am I going to this show?” and my answer to myself was, “Because I think Katt smokes dope with the elites and knows something real.”
Comedy shows enforce no video recording so their jokes are fresh for audiences across the country, so seeing him live he can say things a little more bluntly than he could if the video could go viral on the internet. Sure enough, a major part of Katt’s show started with, “Y’all know I like to sneak into the illuminati and listen to their plans and sneak out and tell you guys.” He told about the JFK assassination, cholesterol in food, some other stuff, and finished with, “But let me be clear: they don’t give a fuck about any of us… I mean ANY of us… No really, ANY of us.” He could not have been more clear about the last part. As a comedy show, it could get lost among the jokes and pass off as drama, but if you believe at all that he could know something specific, he knows something specific. It was a STRONG, CLEAR message. Something is coming that we don’t know about yet and he was telling us.
Also, throughout the show, he kept telling the audience how great we are, and we need to feel appreciated, and we’re doing a great job … like A LOT. Just about as clear as the other message, and considering the title, I thought it seemed like his best effort at making us feel good, before we die, like “Heaven on Earth”. Creepy, but that’s how it felt and it was strong messaging, way out of proportion for a normal comedy show.
Katt Williams’ tour titles and dates:
- World War III Tour, 2021 – Feb 2022
- Dark Matter Tour, 2024
- Heaven on Earth Tour, 2025, last performance 29 Nov 2025
- Golden Age Tour, 23 Jan – 2 May 2026
If Katt’s comedy is part of the messaging, which I think it is, whatever happens might include “World War III”, includes people dying “Heaven on Earth”, and results in a “Golden Age” by 23 January 2026.
The 29 November 2025 final Heaven on Earth performance ruled out Thanksgiving to me as the holiday.
The messaging is not just consistent about destruction. I would say it is also consistent about reconstruction quickly afterwards, hence the Golden Age. There is a lot of nostalgia for the feeling of patriotism after 9/11, like a Golden Age.
Friend’s Doctor Moving in December
I told my friend what I was thinking and he was reminded of what he was told about his favorite doctor. The doctor previously had no plans to move, but in August 2025 the doctor’s secretary told my friend that he had suddenly decided to move to New Zealand, in December.
Concrete in Columbus
Apparently all chip fab plants are built like bunkers – for stability of the machinery. Chip fab plants require hundreds of thousands of cubic yards of concrete. The plant in Columbus, Ohio, which was put on pause months ago, uses the output of 3 on-site concrete plants working continuously since 2020 until present, 2025. The concrete keeps flowing despite the construction pause as of November 2025.
Deagel Report 2025 Forecast
2025 is not over yet.
The following video from 21 April 2021 has poor audio quality, but what he is saying is he follows a think tank called Deagel that likely has connections to intelligence and they published population projections in ~2020 that predicted 50-70% decline in population for the US and Western Europe in 2025. Shortly after publishing, they quickly retracted the report. The following is an explanation by one of the people who saw the report. Various sources saved the report. Here is the report in PDF that somebody saved.
Thanos
The current most popular Marvel villain (/ hero?) is Thanos. He is most famous for making half the planet instantly disappear in order to save the planet from a slow death of over-population. Something that makes me lean toward bio-weapon is the similarity of the name of the debunked company Theranos with the Marvel villain Thanos. Theranos wasted $700 million on something.
Blatancy of the Turning Point Lie
The Turning Point and Charlie Kirk lie is so blatant, I just feel like it wouldn’t be told to a population that was expected to continue to exist.
World Cup and Olympics
World Cup 2026 is hosted by North America.
Olympics 2028 is hosted by Los Angeles.
To me, those are consistent with reconstruction following calamity, Golden Age.
Leave the World Behind
The movie Leave the World Behind was widely believed to be predictive programming as soon as it was released in 2023. I watched it because of that. Although the movie is mostly about infrastructure outage, there is a mushroom cloud in a scene of the movie.
Dust Falling with Rain Summer 2025
Last summer, for the first time in my life, I walked out to my car and there was dust all over it from a recent light rain. Everything everywhere was covered in dust and the dust showed on all the cars. The news story was that the dust had traveled in the atmosphere from a dust storm in Arizona. Could be a natural dust storm, but it would be consistent with conducting a nuclear fallout test.
My Algorithm
Recently, I scrolled my Facebook feed. In under 5 minutes, from sources I believe to be in on this, I saw the word detonate twice and explode once. The words loosely fit in their political rhetoric context, but knowing their past of doublespeak, it was clear doublespeak.
Car Studio 20: Bitcoin Explained
Above all, the most important thing to know about Bitcoin is that it is completely independent of your computer or any digital hardware. You could destroy all your hardware and as long as you have your seed phrase, you have your Bitcoin. That is absolutely true.
My best shot at explaining Bitcoin from bottom to top. Best explanation ever:
Or on Spotify:
Practical Summary
- Bitcoin is not digital currency, it’s mathematical currency.
- Your seed phrase equals your money. Your computers and thumb drives can all die and you still have it.
- You can buy metal tags to write your seed phrase on.
- A public key is an account number.
- A private key verifies your identity as the owner of the corresponding public key and gives you permission to spend the balance of the public key’s account.
- A public key is generated from a private key mathematically. The reverse cannot be done. A private key cannot be generated from a public key. This is the nature of the one-way math problem described in the podcast.
- You could stop there and own Bitcoin in a single account, but then your balance and all your transactions are public and linked to the single public key account number.
- A single private key public key pair would represent a wallet with a single account.
- A wallet can be a collection of multiple connected key pairs that together represent the balance of the wallet and the ability to spend it.
- A seed phrase generates multiple private keys, nearly unlimited, and each private key generates its corresponding public key.
- Like the private key cannot be generated from the public key, the seed phrase cannot be generated even from all the corresponding private keys. The keys generated from a seed phrase appear random and unrelated unless you have the seed phrase – another one-way math problem.
- The seed phrase is everything and is designed to be written down by humans completely off computers. The seed phrase represents the security of your balance.
- The extended public key is the key to just your public keys, so the full balance of the wallet, but not the ability to spend the balance.
- The extended public key represents the privacy of your balance.
Setup I Recommend
- I recommend sparrow wallet on a completely offline laptop.
- Write down your seed phrase in multiple secure places. Possibly commit the seed phrase to memory by repetition.
- I also recommend using a passphrase in addition to the seed phrase.
- Laptops have a camera, which is helpful for using QR codes.
To Receive Bitcoin
To receive, simply generate a receive code (public key) from your Sparrow wallet and send Bitcoin to that code from an app like Coinbase. Sparrow wallet creates a QR code to send to. It’s self-explanatory when using a phone app, usually called transfer Bitcoin.
To Spend Bitcoin
- Use BlueWallet on your phone to create a partially signed Bitcoin transaction from an online wallet of a public key with a balance.
- Transmit the PSBT to the offline laptop wallet using a QR code. Cobang is a linux app to read QR codes with the computer’s camera.
- Sign the PSBT with Sparrow.
- Send the signed transaction back to the phone with a QR code.
Car Studio 19: Monetary Reset and News Becomes History
Monetary Reset
I have been following media clues indicating some kind of reset or planned crisis. This video describes the “follow the money” aspect of what I have been saying.
News Becomes History
The monetary reset video above is one of the best examples of paralleling news alongside history I have seen, which I think is extremely valuable.
Car Studio 18: Book Review Disunited Nations by Peter Zeihan

Jezebel – As It Unfolds
The rhetoric reached a maximum. You could hardly say more than was said to lead up to WW3. The belligerents lined up. Military units were in position. Negotiations and ceasefires were declined. The stage was set. The lines were toed. It just awaited a spark, a line to be crossed. It could have been anything.
Then nothing, … but continued rhetoric. It feels like that was the point.
- 31 December 2025: Iran appointed new central bank governor after currency collapse. Pezeshkian visited some province to talk to locals amid the uprisings.
- 30 December 2025: “Protests erupt in Iran as prices surge and currency hits new low”.
- 30 December 2025: Russian President Vladimir Putin discussed Iran’s nuclear program with Iranian President Masoud Pezeshkian in a phone call, the Kremlin press service said on Tuesday.
- 30 December 2025: “WW3 fears erupt as China fires 27 rockets and sends 71 planes towards Taiwan”. So China’s encirclement exercise around Taiwan continues into its 2nd day. It’s not clear from the article if anything actually hit Taiwan. Seems like it was an exercise of intimidation. Xi Jinping says reunification with Taiwan is unstoppable.
- 30 December 2025: Vladimir Solovyov speech with Putin watching, “War has revealed many things… It has become clear that a man is made for war. In war, everything best comes to the surface… War, by its very nature, is sacred. We are standing against absolute evil. We are Russians – God is with us.”
- 30 December 2025: Russia’s new “unstoppable” nuclear-capable Oreshnik missile complex that could “destroy” London has been “put on combat duty” in Belarus. Moscow boasts it could hit England’s capital “in eight minutes” from this deployment, according to Russian sources. Also, Russian drones hit civilian vessels entering Black Sea Port.
- 30 December 2025: Monument in Panama to Chinese presence in Panama removed, with Trump being blamed as having ordered it for representing too much Chinese influence there.
- 29 December 2025: “US military tests revolutionary long-range strike system from attack helicopters as WW3 fears mount”
- 29 December 2025: China held military drills around Taiwan simulating the seizure and blockade of the island’s key areas, as a warning against “separatist forces”. “All those plotting independence will be annihilated upon encountering the shield!” “Any sinister schemes to obstruct China’s reunification are doomed to fail,”
- 29 December 2025: Putin claimed his residence was attacked during or shortly after Zelensky meeting with Trump on the 28th. Sergei Lavrov, Russia’s foreign minister said that because of the attack, the Kremlin’s position in negotiations to end the war in Ukraine would “be revised”. He told Russian state media: “Such reckless actions will not go unanswered”. The UK has also been accused of involvement in the attack. Putin and Trump agree that Zelensky’s plan for a 60-day ceasefire to get the Ukrainian people on board with ceding parts of the Donbas region to Russia ‘will only prolong the conflict.’ Mike Pompeo: Putin has ‘conceded literally nothing’ in Ukraine peace talks.
- 28 December 2025: Sergey Mikheyev, speaking at a Russian state TV programme heavily controlled by the Kremlin, said: “If we held a referendum on our military policy, and asked Russians what should have happened, Europe and Ukraine would have been turned into a pile of smoking, radioactive ashes a long time ago. … Burn everything down, so they cannot open their mouths again. Yes, there are people with different opinions, but this is the opinion of the majority. Our most important political task is to convince them that it [a war] won’t happen with the same parameters as the Ukrainian one, but it would be a catastrophe.”
- 28 December 2025: “Iran declares ‘total war’ on America and Europe in huge WW3 alert” “They want to bring our country to its knees,” claimed Iran’s President Masoud Pezeshkian. “We are in a full-scale war with the US, Israel and Europe; they don’t want our country to remain stable,” Pezeshkian said, AP reported. Donald Trump has warned Iran that the US will “knock the hell out of them” with a “powerful” strike if they continue efforts to develop nuclear missiles.
- 28 December 2025: North Korea’s Kim Jong Un oversees test launch of long-range cruise missiles. Kim Jong Un urges ‘unlimited and sustained’ development of nuclear combat forces.
- 27 December 2025: North Korean leader Kim Jong Un said that his country’s ties with Russia had been strengthened through “sharing blood, life and death in the same trench” in the Ukraine war, as he sent a New Year’s greeting to Russian President Vladimir Putin.
- 27 December 2025: NATO scrambled 3rd day in a row for Russian attack on Kiev.
- 26 December 2025: NATO scrambled 2nd day in a row for Russian Boxing day attack on Ukraine Novoshakhtinsk oil refinery.
- 25 December 2025: NATO scrambled to intercept and track Russian nuclear bomber aircraft over the Norwegian Sea threatening Northern UK. It remained over international waters.
- 25 December 2025: Trump launched strike in Nigeria in response to Christians being killed.
- 23 December 2025: A new Pentagon report details China’s nuclear missile capabilities and its ability to strike the US should an all-out war break out. … China is capable of striking the majority of the US with their DF-31 missiles.
- 23 December 2025: documents declassified revealing Putin and Bush worried about Pakistan with nuclear weapons (from back in 2001)
- 22 December 2025: Israel’s Netanyahu issues imminent WW3 warning to all allies including UK.
- 19 December 2025: Europe secured a cash loan of $105 billion to lend to Ukraine interest-free to finance the war with Russia. Europe openly considered using $250 billion of frozen Russian assets to loan to Ukraine.
- 19 December 2025: Putin year-end address, talked about European refusal to negotiate, and touted the modernity of his nuclear arsenal.
- 19 December 2025: comet 3I/Atlas scheduled to make its closest approach to Earth. Aliens have NOT visited Earth and have no plans to do so. However, many aren’t sure about that, so this comet is definitely part of the plot. I expect mankind’s first encounter with aliens to be unfriendly. (This comet is probably the #1 thing people have contacted me about in relation to this whole thing). Atlas represents holding up the Earth, which is more symbolism of the Earth being held up, as in the current US-supported global financial system.
- 18 December 2025: Belarusian President Alexander Lukashenko confirmed that the Oreshnik hypersonic ballistic missile system, supplied by the Russian Armed Forces, has already been deployed and is now on combat duty on Belarusian territory. “We have had it since yesterday, and it is already on combat duty,”
- 14 December 2025: Catholic Church jubilee year concluded with the jubilee of prisoners and ceremonial “closing of the doors” worldwide.
- 11 December 2025: Trump: “Things like this end up in third world wars. And I told that the other day, I said, ‘You know, everybody keeps playing games like this, you’ll end up in a third world war.’ And we don’t want to see that happen,” Trump told reporters in the Oval Office on Thursday.
- 11 December 2025: as 3I/Atlas was approaching its closest pass to Earth, Uri Geller (some alien whacko) claimed that it is peaceful hippie aliens coming to save us from nuclear destruction.
- 7 December 2025: The news is portraying Putin as cornered. He should have taken the peace offering. Europe is pressuring him economically, including discussing use of frozen Russian assets for the war in Ukraine. Zelensky standing his ground. Putin vs Trump from here on out.
- 4 December 2025: Putin said he will take the Donbas region of Ukraine by any means.
- 2 December 2025: Jared Kushner and Steve Witkoff met with Putin in Moscow to discuss the Ukraine war. Putin, after the meeting, said unlike with Ukraine, if Europe were to initiate a war with Russia, the conflict would escalate so rapidly that there would be “no one left to negotiate with”
- 30 November 2025: riots in Giessen Germany with media saying the riots bolster Trump’s foreign terror label.
- 30 November 2025: Trump vs Maduro rhetoric has escalated about as much as it can.
- 28 November 2025: state of emergency in Peru as Venezuelan migrants flee North into Peru from Chile.
- 24 November 2025: all US flights to Venezuela cancelled by airlines due to mounting tensions.
- 21 November 2025: official warnings from the FAA about airlines flying over Venezuela due to mounting tensions.
- 18 November 2025: Coudfare internet outage.
- 15 November 2025: riots in Mexico City. Media linked to potential Trump aggression.
- 15 November 2025: Operation Southern Spear, 15,000 troops moved into position near Venezuela with media hyping Trump aggression. Trump approved covert operations in Venezuela.
- 13 November 2025: government shutdown ended after a total of 43 days.
- 12 November 2025: Trump announced the end of the penny as a coin.
- 11 November 2025: for the first time in my life, aurora caught my attention while driving. I thought the geomagnetic storm was 100% made up fake. I was wrong about that apparently – kind of maybe – but what I did not know is that the government actually does have a transmitting antenna array for the purpose of producing aurora, HAARP. Supposedly the artificial aurora are dim and localized, but many have speculated since HAARP was created that it can produce global aurora. I think it’s actually plausible with enough power to do that. Humans produce light that’s visible from space, why not aurora light? It’s just a huge light show resulting from radio waves, and as we know radio waves can travel around the world.
- 10 November 2025: geomagnetic storm warning issued for 11 states north of the 45th parallel: Oregon, Idaho, Montana, South Dakota, Minnesota, Wisconsin, Michigan, New York, Vermont, New Hampshire and Maine.
- Lots of JD Vance in the media, as though we’re being primed for him to take over.
- Two people have told me they had noticed before I contacted them that their ads were showing them survival equipment and supplies.
- 8 Nov: 2025: my in-laws noted that the flight cancellations news “feels like the beginning of COVID”. Feelings like this are relevant. News is designed to manipulate feelings.
- 7 Nov 2025: flights cancelled en masse, due to ATC shortage, government shutdown.
- 4 Nov 2025: solar flares reported (pretext for EMP).
- 4 Nov 2025: UPS plane crash in Louisville, KY. The plane crashed on take-off with the video showing an engine fire prior to the crash and media immediately blamed it on ATC shortage.
- 4 Nov 2025: Russian official Alexei Zhuravlyov, First Deputy Chairman of the State Duma’s Defense Committee, stated there were “no obstacles” to providing Venezuela with advanced Russian missile systems such as the Oreshnik or Kalibr, which are capable of carrying nuclear warheads.
- 1 Nov 2025: federal government SNAP payments lapsed, affecting food supply of 40 million + Americans. Federal judge challenged, Trump insisted as of 9 November.
- ~30 Oct 2025: rumors of top officials, including Marco Rubio, moved to military bases for security.
- 20 October 2025: AWS internet outage.
- ~ Oct 2025: National Guard troops deployed to Memphis, Los Angeles, Portland, other cities. Lots of divisive politics with mayors and governors.
- 1 Oct 2025: government shutdown began.
- 1 Oct 2025: National Guard troops deployed in Chicago.
- 11 August 2025: National Guard troops deployed in Washington DC.
- 29 March 2025: NY Times article, “The Secret History of America’s Involvement in the Ukraine War”. (Summary from Coffee and COVID) Described how the US military had from Day One micromanaged the fighting from a secret base in Weisbaden, Germany, called “Task Force Dragon.” American commanders would tell Ukrainian soldiers where to aim the missile launchers, and the Ukrainians would do it— without even knowing what they were shooting at. They all agreed to call the targets “points of interest,” as if they were a roadside Cat Museum, so that if they were ever sworn under oath, they could deny the Americans had supplied “targeting information.” The Times never explained exactly how it acquired all this classified information, and the wild revelations plopped right down the memory hole. We heard no more about it or about the many officers named in the story. Buh-bye! So far as we know, the arrangement continues to this day.
Who?
The question of who can do something like this will remain the most difficult to answer. Short answer: the power brokers of the world, whoever runs the media and buys politicians. The scapegoats to be framed are Donald Trump, Russia, China, and cyber attacks by rogue AI.
Pay special attention to incidents that are blamed on Trump. We have grown accustomed to problems being blamed on Trump and I think most of this will be blamed on him.
Why?
- Devalue the US national debt by devaluing the dollar. See here.
- End the US dollar as the reserve currency.
- End the Bretton Woods US system.
- Transition to a global digital currency like a CBDC.
- Justify a more global government.
- Justify sweeping surveillance systems like Palantir.
- Justify national or global ID system, possibly implanted chips.